
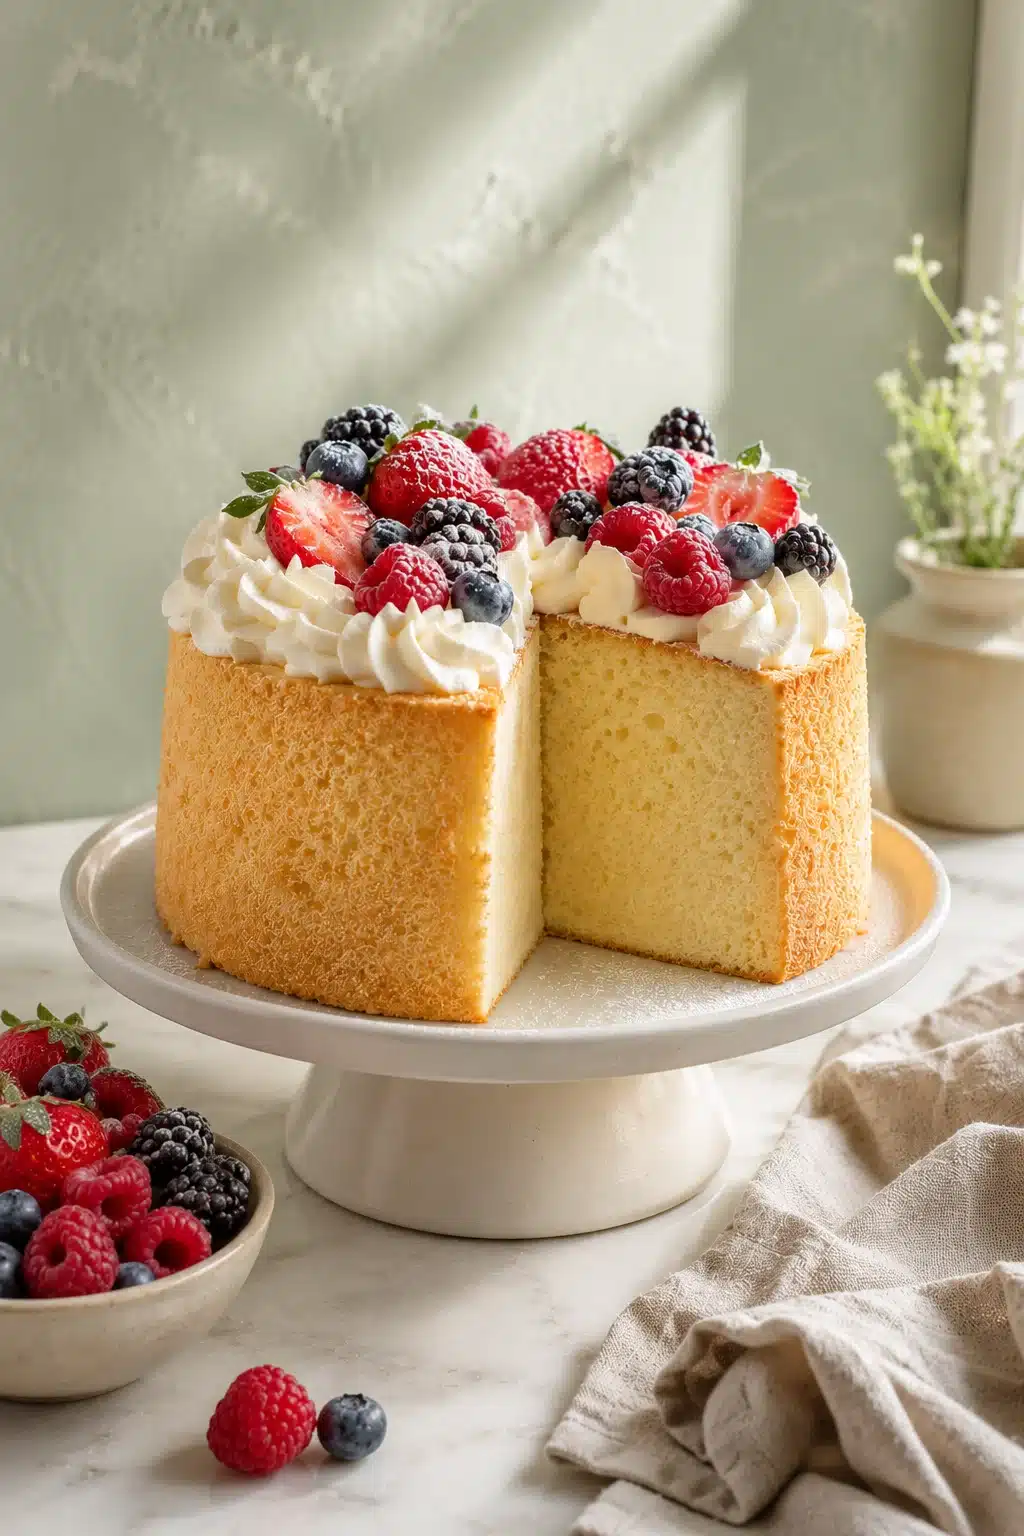
This Classic Chiffon Cake Recipe is light, fluffy, and wonderfully soft with a delicate vanilla flavor. Ready in just 1 hour and 20 minutes, it is perfect for birthdays, holidays, or an everyday dessert that feels extra special.
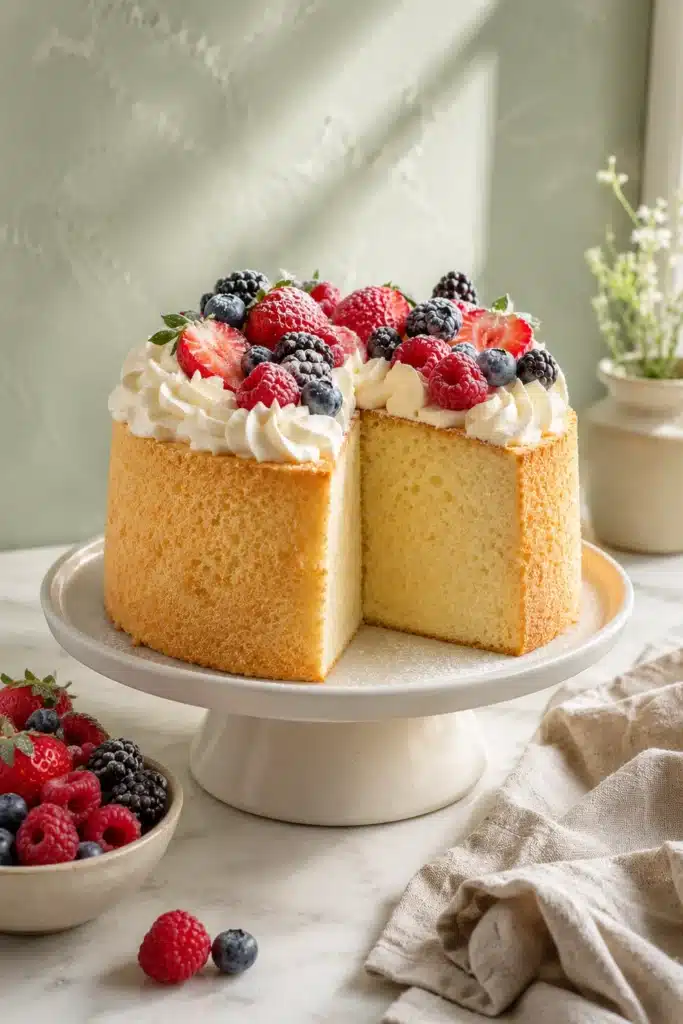
Table of Contents
Why You’ll Love This Classic Chiffon Cake
This Classic Chiffon Cake Recipe stands out because it combines the rich flavor of a butter cake with the airy texture of a sponge cake. As a result, every bite feels soft, moist, and incredibly light.
Unlike many traditional cakes, chiffon cake uses vegetable oil instead of butter. Because of that, the cake stays tender for days without becoming dry. It also has a delicate crumb that pairs beautifully with fresh fruit, whipped cream, or a light dusting of confectioners’ sugar.
Another reason to love this recipe is how versatile it is. You can serve it at birthdays, family dinners, baby showers, or holiday gatherings. Meanwhile, it looks elegant enough for special occasions while remaining simple enough for weekend baking.
I always enjoy making this cake because it reminds me that simple recipes often create the best memories. The smell of vanilla filling the kitchen is hard to beat, and everyone seems to gather around while it cools.
Even better, this Classic Chiffon Cake Recipe gives you plenty of serving options. Add fresh berries during spring and summer, drizzle chocolate ganache for celebrations, or simply enjoy a plain slice with coffee or tea.
If you enjoy baking soft homemade desserts, this cake deserves a permanent place in your recipe collection. Once you master the basic technique, you’ll find yourself making it again and again.
What Makes Chiffon Cake So Light and Fluffy?
The secret behind a perfect Classic Chiffon Cake Recipe is the combination of whipped egg whites and oil. Together, they create a cake that feels incredibly airy while staying moist.
First, the egg whites are whipped with cream of tartar until stiff, glossy peaks form. Then they are folded gently into the batter. This step traps tiny air bubbles that expand during baking. As a result, the cake rises beautifully without becoming heavy.
Cake flour also plays an important role. Because it contains less protein than all purpose flour, it creates a finer crumb and a softer texture. Every slice feels delicate while still holding its shape.
Oil makes another big difference. Unlike butter, oil stays liquid even after the cake cools. Therefore, the cake remains moist for several days without losing its softness.
The ungreased tube pan is equally important. Although it may seem unusual, the batter needs to cling to the sides while rising. If the pan is greased, the cake may not climb properly and could lose volume.
Cooling the cake upside down also protects its airy structure. Instead of collapsing under its own weight, the cake keeps its impressive height until completely cool.
When all these small techniques work together, this Classic Chiffon Cake Recipe delivers a dessert with a light, fluffy, moist, and tender texture that is difficult to match.
Ingredients You’ll Need
Making this Classic Chiffon Cake Recipe requires simple pantry ingredients. However, each one has an important job in creating the cake’s signature texture and delicate flavor.
Dry Ingredients
You will need:
- 1⅔ cups cake flour
- 1 cup granulated sugar, divided
- 2 teaspoons baking powder
- ½ teaspoon salt
Cake flour gives the cake its soft and tender crumb. Meanwhile, baking powder adds extra lift, while salt balances the sweetness. Dividing the sugar allows part of it to strengthen the egg white meringue for a taller cake.
Wet Ingredients
Gather these ingredients before you begin:
- 6 large eggs, separated and brought to room temperature
- ½ teaspoon cream of tartar
- ⅔ cup whole milk, room temperature
- ½ cup canola or vegetable oil
- 2 teaspoons vanilla extract or vanilla bean paste
Room temperature eggs whip more easily and create greater volume. The cream of tartar stabilizes the egg whites, while neutral flavored oil keeps the crumb moist and tender. Vanilla adds the classic flavor that makes this cake so comforting.
Optional Toppings and Serving Ideas
Although this Classic Chiffon Cake Recipe tastes wonderful on its own, you can easily dress it up for any occasion.
Popular toppings include:
- Confectioners’ sugar
- Fresh whipped cream
- Cream cheese whipped topping
- Fresh strawberries
- Blueberries
- Raspberries
- Blackberries
- Chocolate ganache
- Fruit sauces
You can also pair each slice with fresh fruit for a refreshing dessert. Meanwhile, coffee or hot tea makes the perfect companion for an afternoon treat.
Recipe Details
| Detail | Information |
|---|---|
| Prep Time | 30 minutes |
| Cook Time | 50 minutes |
| Total Time | 1 hour 20 minutes |
| Yield | 12 servings |
| Course | Dessert |
| Cuisine | American |
| Texture | Light, airy, fluffy, moist, and tender |
| Flavor | Delicate vanilla with mild sweetness |
| Calories | Approximately 250 to 320 per serving |
How to Make Classic Chiffon Cake
Making this Classic Chiffon Cake Recipe is easier than it looks. The key is to work gently and follow each step in order. As you go, you’ll create a batter that bakes into a tall, soft, and fluffy cake with a delicate vanilla flavor.
Step 1: Prepare the Oven, Pan, and Ingredients
First, preheat your oven to 325°F. Then place an ungreased 10 inch tube pan on your counter. Do not grease the pan because the batter needs to cling to the sides while it rises.
Next, separate the eggs. Although they separate more easily when cold, let both the egg whites and egg yolks come to room temperature before mixing. This small step helps create a stronger meringue and a lighter cake.
Meanwhile, measure every ingredient before you begin. Having everything ready makes the mixing process smooth and helps prevent mistakes.
Also, sift the cake flour if it looks compacted. Fine, fluffy flour blends more evenly into the batter.
Step 2: Mix the Dry Ingredients
In a large bowl, sift together the cake flour, baking powder, salt, and half of the granulated sugar.
Whisk the mixture for about a minute so everything combines evenly. As a result, the baking powder spreads throughout the flour, which helps the cake rise evenly.
Set the bowl aside while you prepare the wet ingredients.
Step 3: Prepare the Egg Yolk Batter
In another large bowl, whisk the egg yolks, whole milk, vegetable oil, and vanilla extract until the mixture becomes completely smooth.
Next, gradually add the dry ingredients to the wet mixture. Stir gently until no dry streaks remain.
Continue mixing only until the batter becomes smooth. However, avoid overmixing because that can make the finished cake less tender.
At this point, the batter should look silky and pour easily from the whisk.
Step 4: Whip the Egg Whites into a Stable Meringue
Place the room temperature egg whites into a perfectly clean mixing bowl.
Add the cream of tartar and beat on medium speed until the whites become foamy.
Then slowly add the remaining sugar, one spoonful at a time.
Increase the mixer speed to medium high and continue beating until stiff, glossy peaks form. The meringue should hold its shape when you lift the beaters.
Take care not to overbeat the egg whites. If they become dry or grainy, they will not fold smoothly into the batter.
Step 5: Fold the Meringue into the Batter
Add about one third of the whipped egg whites to the egg yolk batter.
Gently fold them in with a large rubber spatula. This first addition lightens the batter and makes the remaining folding much easier.
Next, add the remaining meringue in two additions.
Fold carefully by cutting through the center, scraping along the bottom, and lifting the batter over the top. Turn the bowl slightly after each fold.
Continue until no white streaks remain. Meanwhile, work slowly so you do not lose the air bubbles that create the cake’s signature height.
The finished batter should look light, smooth, and airy.
Step 6: Fill the Pan and Bake
Carefully pour the batter into the ungreased tube pan.
Smooth the top gently with a spatula.
Place the pan on the center oven rack.
Bake for about 50 minutes. During baking, avoid opening the oven door during the first part of the baking time because sudden temperature changes can cause the cake to sink.
The cake is ready when the top turns golden brown, springs back lightly when touched, and a cake tester comes out clean.
The kitchen will fill with a sweet vanilla aroma that lets you know the cake is almost done.
Step 7: Cool the Cake Upside Down
Immediately remove the cake from the oven.
Turn the tube pan upside down and allow the cake to cool completely before removing it.
This step is very important because the delicate structure is still setting. As a result, cooling upside down helps the cake keep its impressive height.
Allow the cake to cool for at least one to two hours.
Once fully cooled, run a thin knife around the edges and center tube. Carefully lift the cake from the pan.
Step 8: Slice, Garnish, and Serve
Transfer the cooled cake to a serving plate.
Dust the top lightly with confectioners’ sugar for a simple finish.
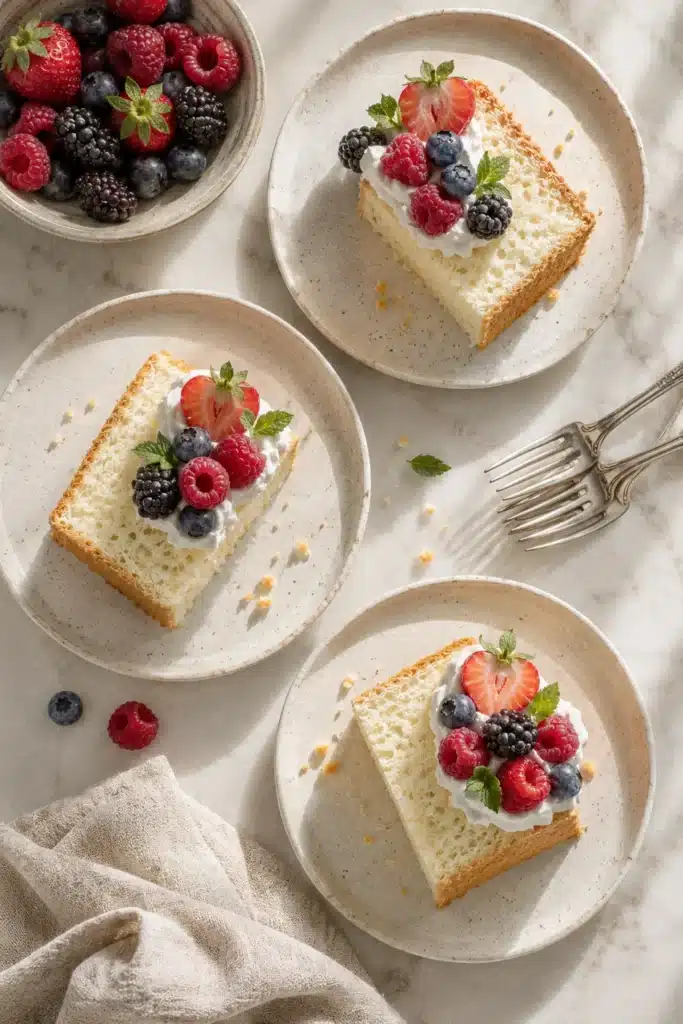
For a more elegant dessert, add whipped cream or cream cheese whipped topping along with fresh strawberries, blueberries, raspberries, or blackberries.
Chocolate ganache or fruit sauce also pairs beautifully with this Classic Chiffon Cake Recipe.
When slicing, use a sharp serrated knife. Clean the blade between slices for neat, beautiful servings.
This cake tastes wonderful the day it is baked. However, it also stays moist for several days, making it a great make ahead dessert for parties and family gatherings.
Whether you serve it plain or decorate it with fresh fruit, this Classic Chiffon Cake Recipe delivers a soft, fluffy texture and delicate vanilla flavor that everyone will love.
Expert Tips for the Best Chiffon Cake
A perfect Classic Chiffon Cake Recipe comes down to technique more than complicated ingredients. Fortunately, a few simple tips can make a big difference. Once you understand the process, you’ll bake a beautifully tall and fluffy cake every time.
Always use cake flour instead of all purpose flour. It creates the soft, fine crumb that chiffon cake is known for.
Also, bring the eggs, milk, and other refrigerated ingredients to room temperature before mixing. They blend more easily and help create a smoother batter.
Use only a neutral flavored oil like canola or vegetable oil. Strong flavored oils can overpower the delicate vanilla taste.
Meanwhile, take your time when whipping the egg whites. Stiff, glossy peaks provide the structure that gives chiffon cake its impressive height.
Fold the meringue gently into the batter. Slow, careful folding keeps the air bubbles intact, which helps the cake stay light and fluffy.
Finally, cool the cake upside down until completely cold. Although waiting can be difficult, this step helps the cake hold its shape without collapsing.
Common Mistakes to Avoid
Several small mistakes can affect the final texture.
- Greasing the tube pan
- Using cold eggs
- Overmixing the batter
- Overbeating the egg whites
- Folding the meringue too roughly
- Opening the oven door too early
- Removing the cake before it cools completely
- Using a dull knife for slicing
Even one of these mistakes can reduce the cake’s height or make the crumb dense. Therefore, paying attention to each step gives the best results.
Secrets to a Soft, Airy Texture Every Time
Always sift the dry ingredients before mixing. This creates a lighter batter and removes small lumps.
Next, whip the egg whites only until stiff, glossy peaks form. Dry or grainy egg whites do not fold well.
Fold with a rubber spatula instead of stirring. Gentle folding keeps the batter full of tiny air pockets.
Bake the cake until it springs back lightly when touched. Then invert the pan immediately after removing it from the oven.
Finally, use a serrated knife when serving. Clean slices keep the delicate crumb looking beautiful.
Flavor Variations and Easy Customizations
One of the best things about this Classic Chiffon Cake Recipe is how easily you can change the flavor while keeping the same soft texture.
Citrus Chiffon Cake
For a bright, fresh dessert, add one tablespoon of lemon, lime, or orange zest to the batter.
You can also replace part of the vanilla with fresh citrus juice for even more flavor. Fresh berries and whipped cream make an excellent finishing touch.
Chocolate Chiffon Cake
Chocolate lovers can replace a small portion of the cake flour with unsweetened cocoa powder.
Meanwhile, serve each slice with chocolate ganache, whipped cream, or chocolate curls for an extra special dessert.
Berry and Vanilla Variations
Fresh berries pair beautifully with this cake.
Top slices with strawberries, blueberries, raspberries, or blackberries. Then add whipped cream or cream cheese whipped topping for a colorful presentation.
You can also spoon berry sauce over each serving for extra sweetness.
Other Flavor Extract Ideas
Although vanilla is the classic choice, other extracts work wonderfully.
Try:
- Almond extract
- Coconut extract
- Lemon extract
- Orange extract
- Maple extract
- Butter extract
Use these flavors sparingly because a little goes a long way.
Serving Suggestions
This Classic Chiffon Cake Recipe fits almost any occasion. Because it has a light texture, it works well after both casual meals and holiday dinners.
Simple Everyday Toppings
Sometimes simple is best.
Dust the cake with confectioners’ sugar and enjoy it with coffee or tea.
Fresh whipped cream also adds richness without making the cake feel heavy.
Seasonal berries bring natural sweetness and beautiful color.
Meanwhile, a spoonful of fruit sauce creates an easy dessert that looks bakery worthy.
Elegant Dessert Presentation Ideas
For birthdays or celebrations, decorate the cake with swirls of whipped cream and plenty of fresh berries.
Chocolate ganache creates a richer dessert, while edible flowers add a beautiful finishing touch.
You can also serve each slice with vanilla ice cream or fruit compote for an impressive presentation.
Storage and Make Ahead Tips
This Classic Chiffon Cake Recipe stores well, making it perfect for preparing ahead of special occasions.
Room Temperature Storage
Store the unfrosted cake in an airtight container at room temperature for up to 2 days.
Keep it away from direct sunlight and heat so it stays soft and moist.
Refrigerating and Freezing
If the cake has whipped cream or frosting, refrigerate it for up to 5 days.
Wrap leftover slices tightly before refrigerating.
For longer storage, wrap the cooled cake in plastic wrap and then aluminum foil before freezing.
Freeze for up to 3 months.
Thaw overnight in the refrigerator or for several hours at room temperature before serving.
Preparing the Cake in Advance
Bake the cake one day before serving if you’re planning for a party.
Keep it unfrosted until serving day. Then decorate with whipped cream, berries, or your favorite toppings for the freshest appearance.
This simple approach saves time while keeping the cake looking beautiful.
Craving More Delicious Recipes?
If you enjoyed this Classic Chiffon Cake Recipe, try these homemade desserts next:
- https://ketoatmeal.com/pina-colada-cake/ (tropical pina colada cake recipe)
- https://ketoatmeal.com/lemon-blueberry-mini-cheesecakes/ (creamy lemon blueberry mini cheesecakes)
- https://ketoatmeal.com/best-key-lime-pie/ (refreshing best key lime pie)
- https://ketoatmeal.com/no-bake-banana-cream-pudding-cheesecake/ (easy no bake banana cream pudding cheesecake)
- https://ketoatmeal.com/blueberry-cobbler/ (warm homemade blueberry cobbler)
- https://ketoatmeal.com/strawberry-lemon-bars/ (buttery strawberry lemon bars)
You can also find more dessert inspiration and recipe ideas on Pinterest at https://www.pinterest.com/ketoatmeal/.
Final Thoughts
This Classic Chiffon Cake Recipe proves that simple ingredients can create an unforgettable dessert. With its light texture, delicate vanilla flavor, and moist crumb, it is a cake that suits almost any celebration.
Although chiffon cake uses a few special techniques, every step is easy once you understand the process. Gentle folding, proper cooling, and careful mixing all help create a tall, fluffy cake that looks as wonderful as it tastes.
Whether you serve it plain with confectioners’ sugar or decorate it with whipped cream, fresh berries, or chocolate ganache, this recipe always delivers beautiful results. Bake it for birthdays, holidays, family dinners, or afternoon coffee, and it is sure to become one of your favorite homemade desserts.