
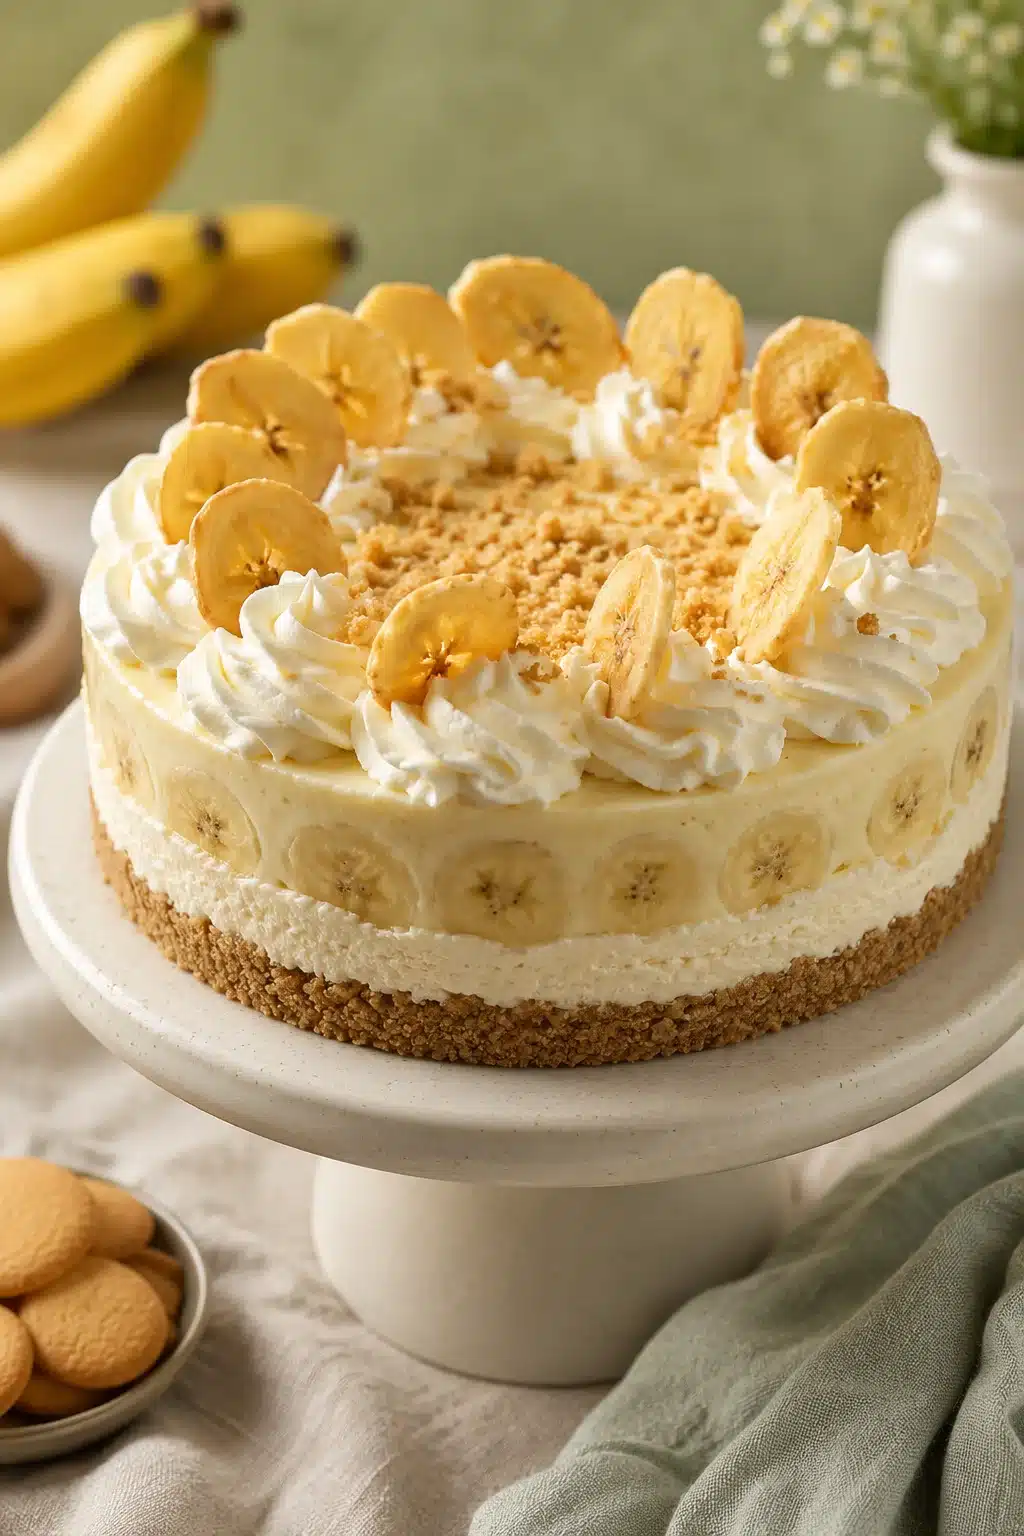
This No Bake Banana Cream Pudding Cheesecake is rich, creamy, and packed with fresh banana flavor. It comes together with simple ingredients and plenty of chill time for beautiful layers. If you love classic banana pudding, this dessert deserves a spot on your table too.
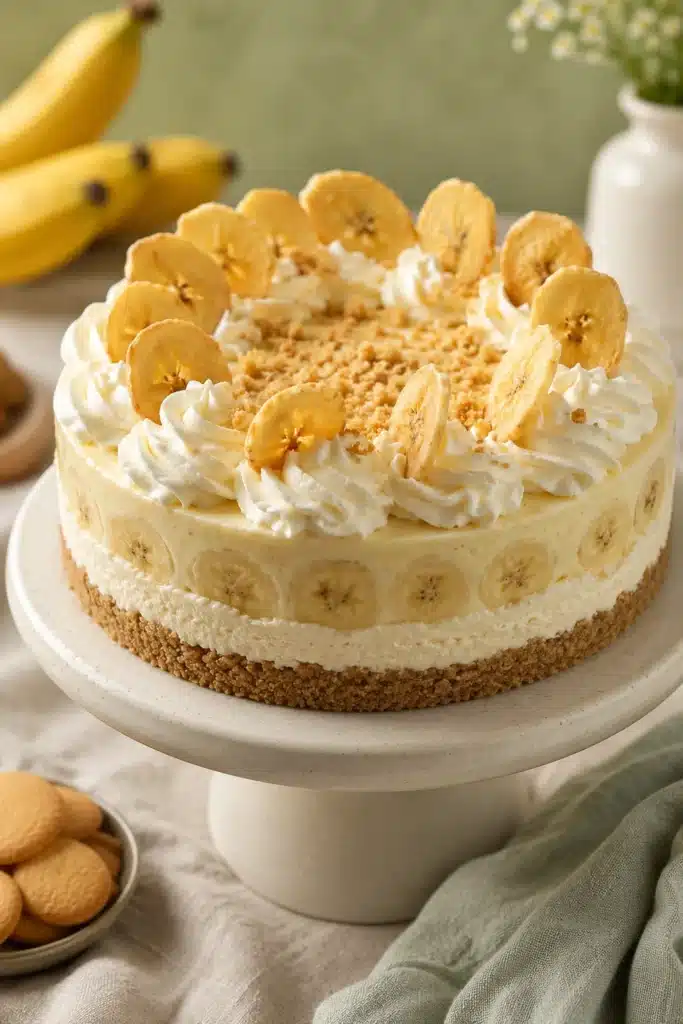
Table of Contents
Why You’ll Love This No Bake Banana Cream Pudding Cheesecake
This No Bake Banana Cream Pudding Cheesecake brings together two favorite desserts in one irresistible recipe. You get the smooth richness of cheesecake along with the comforting flavor of homemade banana cream pudding. As a result, every bite feels creamy, light, and satisfying.
The vanilla wafer crust adds just the right amount of crunch. Meanwhile, the fresh banana slices create a naturally sweet layer that pairs perfectly with the silky pudding. Finally, the fluffy whipped cream topping finishes everything with a light and airy texture.
Another reason to love this recipe is that you never need to turn on the oven. That makes it a wonderful dessert for warm summer days. It is also perfect when you want something impressive without heating the kitchen.
Even though this cheesecake chills for several hours, the actual hands on work is simple. You prepare each layer one at a time, then let the refrigerator do the rest. As a result, it is a great make ahead dessert for holidays, birthdays, family dinners, or weekend gatherings.
I always enjoy serving this cheesecake after a barbecue or Sunday meal. Everyone gets excited when they see those beautiful layers, and there are rarely leftovers.
You can also customize this dessert in several ways. For example, use instant pudding for a faster version or decorate the top with banana chips and crushed vanilla wafers for extra crunch. No matter how you serve it, this No Bake Banana Cream Pudding Cheesecake always looks beautiful and tastes even better.
Ingredients You’ll Need
This recipe uses easy to find ingredients that work together to create smooth layers and classic banana flavor. Although each part is simple, every ingredient has an important job. Therefore, using quality ingredients makes a noticeable difference.
Vanilla Wafer Crust
The crust creates a sturdy base that supports every creamy layer.
You will need:
- 11 ounces vanilla wafers, finely crushed
- 8 tablespoons unsalted butter, melted
The melted butter binds the crumbs together. Then the crust chills until firm, giving the cheesecake a solid foundation. Press the crumbs slightly up the sides of the springform pan for a bakery style look.
Homemade Banana Cream Pudding
The homemade pudding gives this dessert its rich banana flavor.
You will need:
- 1/3 cup granulated sugar
- 2 tablespoons all purpose flour
- 1/8 teaspoon fine sea salt
- 1½ cups heavy whipping cream
- 1/2 teaspoon banana extract or vanilla extract
- 2 large egg yolks, lightly beaten
The flour thickens the pudding while the egg yolks create a silky texture. Meanwhile, banana extract gives a stronger banana flavor. However, vanilla extract also works well if that is what you have on hand.
Creamy Cheesecake Filling
This layer stays smooth, rich, and creamy.
You will need:
- 16 ounces full fat block cream cheese, softened
- 1/2 cup granulated sugar
- 2 tablespoons heavy whipping cream
- 1 teaspoon vanilla extract
Always use full fat block cream cheese instead of whipped or spreadable cream cheese. Also, let it soften before mixing so the filling becomes completely smooth.
Whipped Cream Topping
Fresh whipped cream gives the cheesecake its light finish.
You will need:
- 2 cups heavy whipping cream
- 1½ cups powdered sugar
Beat the cream until soft peaks begin to form. Then slowly add the powdered sugar and continue mixing until stiff peaks develop. This creates a topping that holds its shape beautifully.
Optional Garnishes
These finishing touches make the cheesecake look extra special.
You can add:
- 2 ripe but firm bananas, sliced
- Banana chips
- 1/4 cup crushed vanilla wafers
Fresh banana slices create another layer of flavor. Meanwhile, banana chips add crunch, and crushed vanilla wafers provide a classic finishing touch. Although these garnishes are optional, they make this No Bake Banana Cream Pudding Cheesecake look like it came from a bakery.
Kitchen Tools You’ll Need
You do not need any fancy equipment to make this dessert. In fact, a few basic kitchen tools are all it takes.
Gather these items before you begin:
- 9 inch springform pan
- Mixing bowls
- Medium saucepan
- Whisk
- Electric hand mixer or stand mixer
- Rubber spatula
- Measuring cups and spoons
- Plastic wrap
- Offset spatula or spoon for smoothing layers
- Piping bag with tip if you want decorative whipped cream
A springform pan gives the cleanest presentation and makes serving much easier. However, a deep 9 inch pie dish or square baking dish also works if needed. Preparing all your tools before you start also makes the entire process smoother and more enjoyable.
How to Make No Bake Banana Cream Pudding Cheesecake
Making No Bake Banana Cream Pudding Cheesecake is easier than it looks. Although there are several layers, each one comes together with simple ingredients and basic techniques. Then, after enough chilling time, you will have a beautiful dessert with clean slices and incredible flavor.
Step 1: Prepare and Chill the Vanilla Wafer Crust
Start by lightly greasing a 9 inch springform pan. This makes removing the cheesecake much easier later.
Next, place the finely crushed vanilla wafers into a mixing bowl. Add the melted butter and stir until every crumb is evenly coated. The mixture should look like wet sand and hold together when pressed.
Transfer the crumbs into the prepared pan. Then press them firmly across the bottom and slightly up the sides. Use the bottom of a measuring cup or a flat glass to create an even layer.
Take a few extra moments to press the crust firmly. As a result, it will stay together when you slice the cheesecake.
Place the pan into the refrigerator for at least 30 minutes. Meanwhile, prepare the homemade banana cream pudding.
Step 2: Make the Homemade Banana Cream Pudding
Combine the granulated sugar, flour, and sea salt in a medium saucepan. Whisk everything together until evenly mixed.
Next, slowly pour in the heavy whipping cream while whisking continuously. This helps prevent lumps from forming.
Stir in the banana extract or vanilla extract.
Place the saucepan over medium low heat. Stir constantly with a whisk or wooden spoon as the mixture begins to warm.
After several minutes, the pudding will start to thicken. However, do not stop stirring because the cream can scorch if left alone.
In a separate bowl, lightly beat the egg yolks.
Once the cream mixture is hot, slowly add a few spoonfuls into the egg yolks while whisking constantly. This step tempers the eggs so they do not scramble.
Gradually pour the tempered egg mixture back into the saucepan.
Continue cooking while stirring constantly until the pudding becomes thick, smooth, and creamy. It should coat the back of a spoon without running off quickly.
Remove the pan from the heat immediately.
Cover the surface of the pudding directly with plastic wrap. This prevents a skin from forming as it cools.
Allow the pudding to cool for a few minutes at room temperature. Then refrigerate it for about 2 hours until completely chilled.
Step 3: Prepare the Cream Cheese Filling
While the pudding chills, prepare the cheesecake layer.
Place the softened cream cheese into a large mixing bowl.
Beat it with an electric mixer until light, fluffy, and completely smooth. Scrape down the sides of the bowl as needed.
Next, gradually add the granulated sugar.
Continue mixing until the sugar fully dissolves into the cream cheese.
Add the heavy whipping cream and vanilla extract.
Beat again until everything becomes silky and creamy.
Remove the chilled crust from the refrigerator.
Spread the cheesecake filling evenly over the crust.
Use an offset spatula or the back of a spoon to smooth the surface.
Place the pan back into the refrigerator for about 2 hours. During this time, the filling becomes firm enough to support the remaining layers.
Step 4: Whip the Fresh Cream Topping
Pour the heavy whipping cream into a chilled mixing bowl.
Beat the cream until it begins to thicken.
Then gradually add the powdered sugar while mixing.
Continue beating until stiff peaks form.
The whipped cream should hold its shape without becoming grainy. Therefore, stop mixing once the peaks stand upright.
If you plan to pipe decorative swirls on top, reserve about one third of the whipped cream before assembling the cheesecake.
Keep the whipped cream refrigerated until needed.
Step 5: Assemble the Cheesecake Layers
Once the cheesecake layer has chilled completely, remove it from the refrigerator.
Arrange the sliced bananas in a single even layer across the top of the cheesecake filling.
Try to cover the surface evenly so every slice includes fresh banana.
Next, spoon the chilled banana pudding over the bananas.
Spread the pudding carefully into an even layer. Work gently so the banana slices stay in place.
After that, spread most of the whipped cream across the pudding.
Smooth the surface with a spatula for a clean finish.
If you saved extra whipped cream, pipe decorative swirls around the edges or across the top.
Finally, sprinkle crushed vanilla wafers over the whipped cream.
Add banana chips if desired for extra crunch and a beautiful presentation.
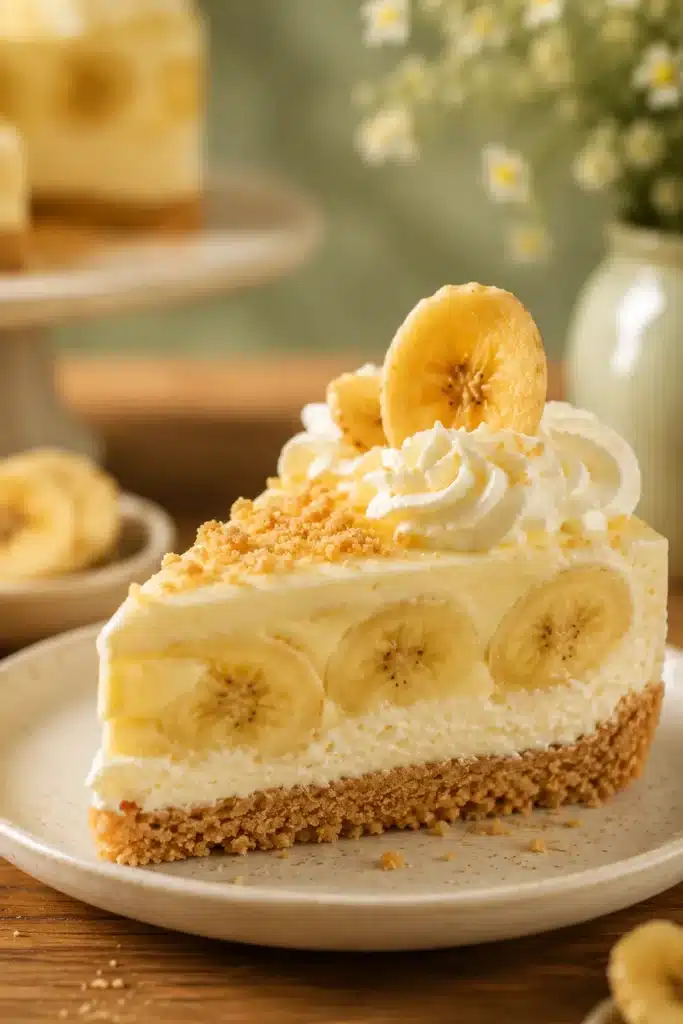
At this point, your No Bake Banana Cream Pudding Cheesecake should have distinct layers of crust, cheesecake, bananas, pudding, and whipped cream.
Step 6: Chill Until Fully Set Before Serving
This final chilling step is just as important as every other one.
Place the assembled cheesecake back into the refrigerator for another 2 to 4 hours.
Although waiting can feel difficult, this extra time allows every layer to firm up properly.
As a result, the cheesecake slices cleanly and keeps its beautiful shape.
When you are ready to serve, carefully remove the springform ring.
For the cleanest slices, dip a sharp knife into hot water. Wipe it dry before each cut.
Repeat this process between slices for neat, bakery style pieces.
Serve the cheesecake chilled.
Store any leftovers in an airtight container in the refrigerator for up to 3 days.
If you want an even quicker version next time, you can replace the homemade pudding with instant banana or vanilla pudding. However, the homemade version gives this No Bake Banana Cream Pudding Cheesecake its rich texture and fresh flavor that truly make it special.
Expert Tips for the Best Banana Cream Pudding Cheesecake
A few simple tricks can make your No Bake Banana Cream Pudding Cheesecake look and taste even better. Although this recipe is beginner friendly, paying attention to the details helps every layer stay smooth and stable. As a result, you’ll enjoy a dessert that slices beautifully and tastes just like one from your favorite bakery.
Choose the Best Bananas
Use ripe bananas that still feel firm when gently squeezed.
They should have bright yellow peels with only a few brown spots. This gives you sweet banana flavor without overly soft fruit.
Avoid bananas that are completely green because they lack sweetness. Also, avoid overripe bananas since they can become mushy and release extra moisture.
If you want to slow browning, lightly brush the banana slices with a little lemon or orange juice before layering them.
Don’t Rush the Chilling Time
Every chilling step matters.
Although it may be tempting to move quickly, allowing each layer to chill fully creates clean, defined layers.
The crust becomes firm after the first chill. Then the cheesecake filling sets before the pudding is added. Finally, the completed dessert needs several more hours to become perfectly sliceable.
For the best texture, prepare the cheesecake a day before serving.
Keep Every Layer Smooth and Stable
Always spread each layer gently with an offset spatula or the back of a spoon.
Meanwhile, avoid pressing too hard because the layers can mix together.
When making the pudding, stir constantly over medium low heat. This prevents lumps and creates a silky texture.
Also, use softened cream cheese to avoid tiny lumps in the cheesecake filling.
Make Clean, Bakery Style Slices
For beautiful slices, chill the cheesecake until completely firm.
Next, dip a sharp knife into hot water before each cut.
Wipe the blade clean after every slice. Then repeat the process for the next piece.
This simple trick keeps the creamy layers neat and attractive from the first slice to the last.
Easy Variations and Ingredient Substitutions
One of the best things about No Bake Banana Cream Pudding Cheesecake is how easy it is to customize. Whether you want a faster dessert or a new flavor, these ideas make it simple.
Shortcut Version with Instant Pudding
Short on time?
Replace the homemade pudding with instant banana pudding or instant vanilla pudding.
Simply prepare it according to the package directions. Then chill it before assembling the cheesecake.
Although the homemade pudding has a richer taste, the shortcut version is perfect for busy days.
Different Cookie Crust Options
Vanilla wafers are the classic choice, but other cookies work well too.
Try graham crackers for a traditional cheesecake crust.
Golden sandwich cookies create an extra sweet base.
Shortbread cookies also give the crust a rich buttery flavor.
Prepare each crust the same way by combining the crumbs with melted butter before chilling.
Fun Flavor Variations
You can easily change the flavor to match your family’s favorites.
Mix a little cinnamon into the crust for warm spice.
Top the cheesecake with caramel sauce for a banana caramel dessert.
You can also drizzle melted chocolate over the whipped cream.
For a tropical twist, sprinkle toasted coconut on top before serving.
Individual Mini Cheesecakes
Instead of making one large cheesecake, divide the crust into muffin liners or small dessert glasses.
Next, layer the cheesecake filling, bananas, pudding, and whipped cream just like the full size version.
Mini cheesecakes are perfect for parties, holidays, baby showers, and family gatherings because everyone gets their own serving.
Storage and Make Ahead Tips
This dessert stores surprisingly well when kept cold. In fact, making it ahead often improves the texture because the layers have extra time to set.
How to Store Leftovers
Cover leftover cheesecake tightly or transfer slices to an airtight container.
Store it in the refrigerator for up to 3 days.
For the freshest flavor, keep the cheesecake chilled until serving time.
Can You Freeze This Cheesecake?
Yes, but the texture of the fresh bananas may change after thawing.
If you plan to freeze it, consider assembling the cheesecake without the banana slices. Add fresh bananas after thawing for the best results.
Wrap the cheesecake tightly with plastic wrap and foil.
Freeze for up to one month.
Thaw overnight in the refrigerator before serving.
How Far in Advance Can You Make It?
This No Bake Banana Cream Pudding Cheesecake is an excellent make ahead dessert.
Prepare it one day before your event.
Then let it chill overnight.
Add the final garnishes just before serving so everything looks fresh and crisp.
Serving Suggestions
This creamy dessert tastes wonderful on its own. However, a few simple finishing touches make it even more special.
Perfect Toppings
Top each slice with extra whipped cream for a bakery style finish.
Then sprinkle crushed vanilla wafers over the top for extra crunch.
Fresh banana slices add more natural sweetness.
Banana chips provide a crisp texture that contrasts beautifully with the creamy filling.
If you enjoy caramel, drizzle a little caramel sauce over each slice just before serving.
Best Occasions to Serve This Dessert
This No Bake Banana Cream Pudding Cheesecake fits almost any celebration.
Serve it during summer cookouts, birthday parties, Easter dinners, Mother’s Day brunch, or holiday gatherings.
It also makes a wonderful weekend dessert because you can prepare it ahead of time.
No matter the occasion, this cheesecake always disappears quickly.
Craving More Delicious Recipes?
If you enjoyed this No Bake Banana Cream Pudding Cheesecake, here are more desserts you’ll love:
- Creamy No Bake Cheesecake Recipes You’ll Love
https://ketoatmeal.com/no-bake-cheesecake/ - Easy Homemade Banana Pudding Dessert
https://ketoatmeal.com/banana-pudding/ - The Best Homemade Vanilla Wafer Dessert Ideas
https://ketoatmeal.com/vanilla-wafer-desserts/ - Rich and Creamy No Bake Pie Recipes
https://ketoatmeal.com/no-bake-pie/ - Easy Summer Desserts You Can Make Ahead
https://ketoatmeal.com/summer-desserts/ - Simple Banana Dessert Recipes for Every Occasion
https://ketoatmeal.com/banana-desserts/
Final Thoughts
This No Bake Banana Cream Pudding Cheesecake combines everything people love about classic banana pudding and creamy cheesecake in one beautiful dessert. Each layer brings something special, from the buttery vanilla wafer crust to the rich cheesecake filling, silky banana pudding, fresh bananas, and fluffy whipped cream.
Although it takes time to chill, the hands on preparation is simple and rewarding. As a result, this dessert works well for both beginner and experienced home bakers.
If you are looking for a dessert that feels comforting, impressive, and perfect for sharing, this recipe is an excellent choice. You can also make it ahead, which makes entertaining much easier.
For even more dessert inspiration, follow us on Pinterest at https://www.pinterest.com/ketoatmeal/ where you’ll find plenty of easy recipes to enjoy all year long.