
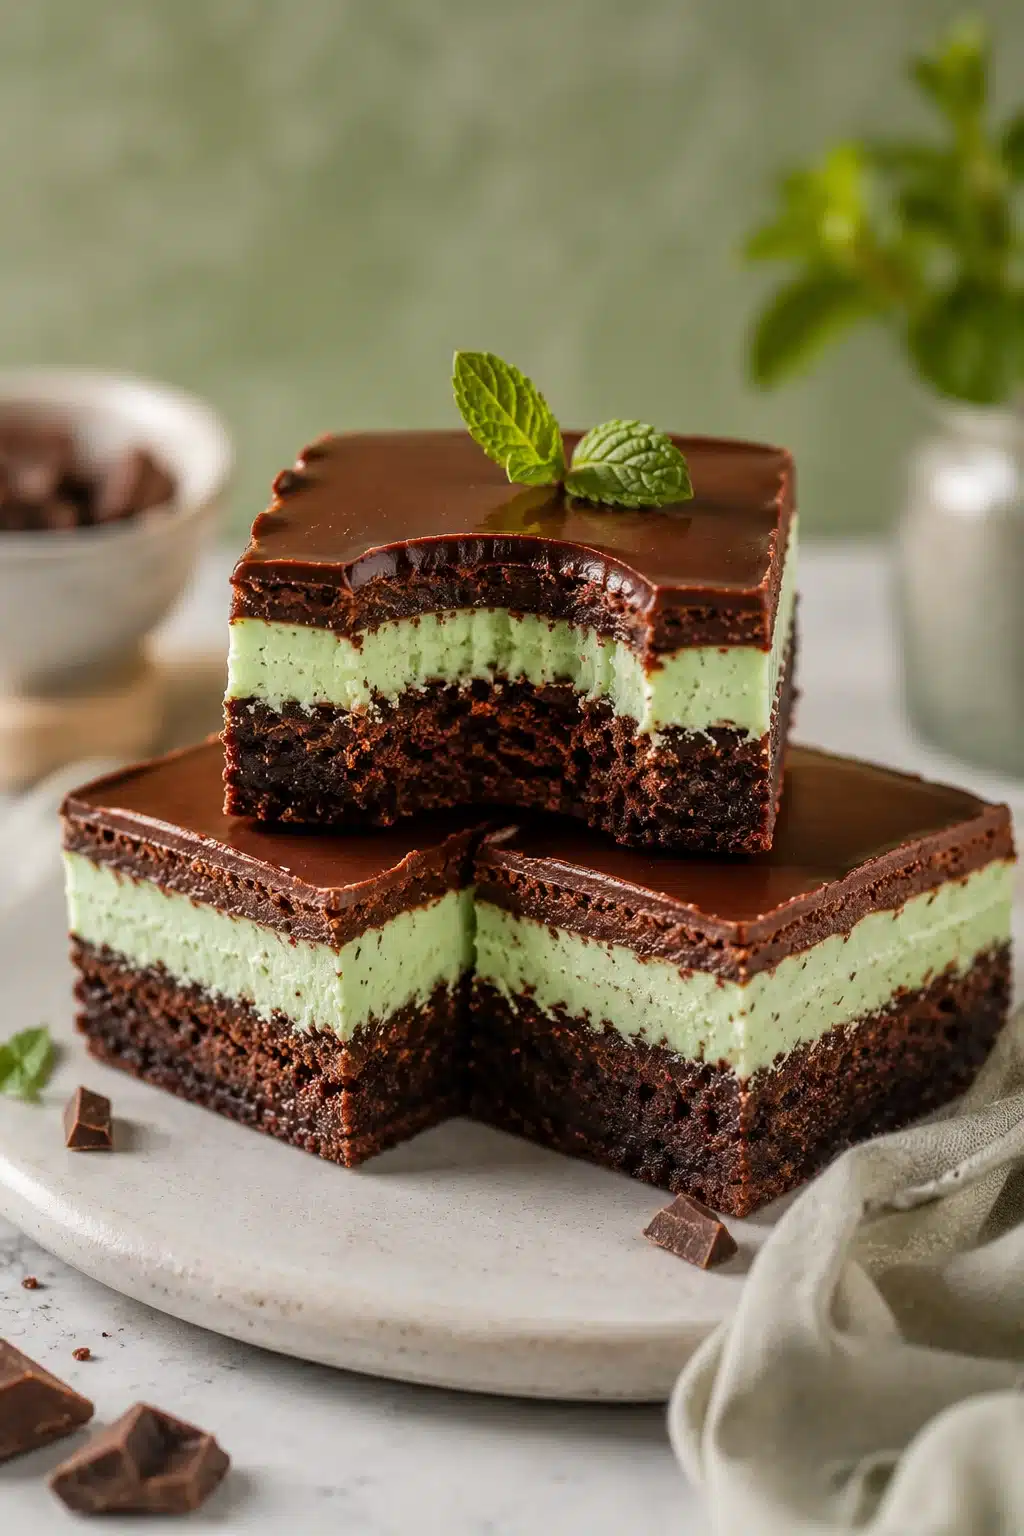
These Mint Brownies are rich, creamy, and packed with chocolate and cool mint flavor. Ready with simple pantry ingredients, they are perfect for holidays, parties, or anytime you want an unforgettable homemade dessert.
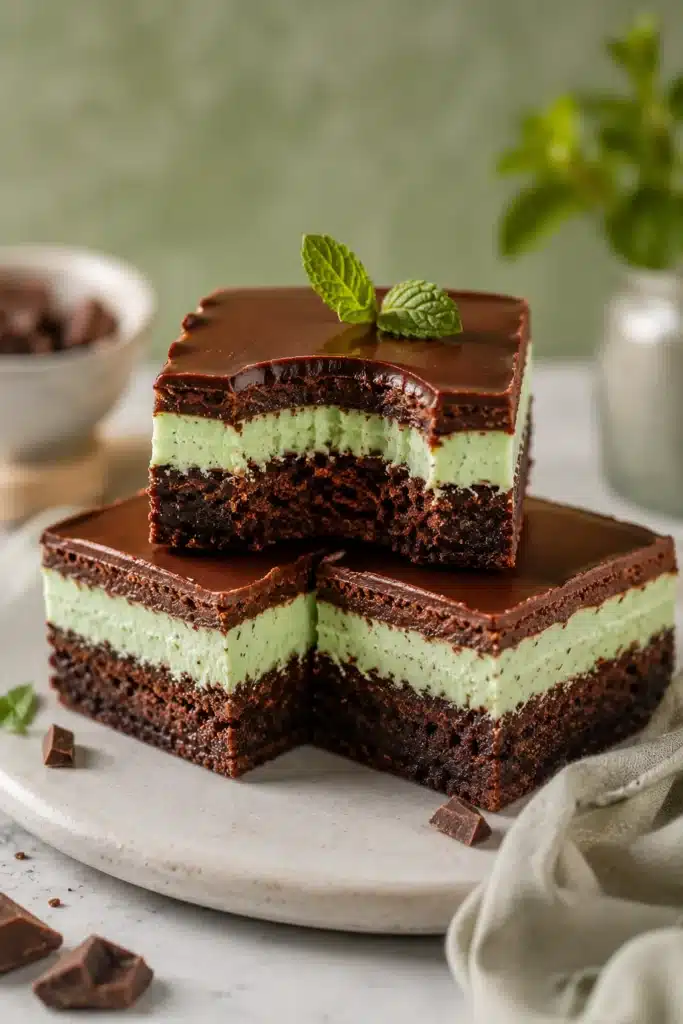
Table of Contents
Why You’ll Love These Mint Brownies
If you love the classic mix of chocolate and mint, these Mint Brownies belong on your baking list. Every bite starts with a fudgy chocolate brownie, followed by a smooth mint filling, and finishes with a silky chocolate ganache. As a result, you get three delicious layers that look just as good as they taste.
These Mint Brownies are surprisingly simple to make. Although they look bakery worthy, each layer comes together with basic ingredients and easy techniques. Then, after a short chill in the refrigerator, they slice into beautiful squares.
Another reason to love this recipe is how rich the brownies are. Because each square is packed with flavor, a small serving goes a long way. That makes them an excellent dessert for birthdays, holiday cookie trays, potlucks, or family gatherings.
You can also prepare these Mint Brownies ahead of time. In fact, they taste even better after chilling because the layers become firm and easy to slice. That means less stress on the day you plan to serve them.
I always enjoy making these brownies during the holiday season. However, they disappear just as quickly during summer barbecues or weekend family dinners. Every time I serve them, someone asks for the recipe.
What Makes These Mint Brownies So Irresistible?
The secret behind these Mint Brownies is the balance of flavors. The rich chocolate brownie has deep cocoa notes, while the creamy mint filling adds just enough freshness without overpowering the dessert. Then the smooth chocolate ganache brings everything together.
Unlike overly sweet mint desserts, this recipe keeps every layer balanced. The bittersweet chocolate in the ganache adds richness, while the mint extract creates a refreshing finish. As a result, every bite tastes smooth instead of overly sugary.
Texture also plays a big role. First, the brownie stays moist and fudgy. Next, the butter based mint filling becomes creamy and light. Finally, the ganache creates a glossy finish that melts in your mouth.
These Mint Brownies are also easy to customize. You can add Andes crème de menthe baking chips for extra mint flavor or keep the recipe simple with the classic three layers. Either option delivers fantastic results.
Even better, the recipe works for both beginner and experienced bakers. Since each step is straightforward, you do not need any advanced baking skills. Just take your time with each layer and chill between steps for the cleanest slices.
If you enjoy desserts that combine rich chocolate with refreshing flavors, these Mint Brownies will quickly become one of your favorites.
Ingredients You’ll Need
These Mint Brownies use simple baking staples that work together to create three delicious layers. Therefore, gathering everything before you begin makes the process much easier. Room temperature ingredients also mix more smoothly and create a better texture. <table> <tr> <th>Ingredient</th> <th>Purpose</th> </tr> <tr> <td>Unsalted butter</td> <td>Adds richness to both the brownie and mint layer</td> </tr> <tr> <td>Unsweetened chocolate</td> <td>Creates deep chocolate flavor</td> </tr> <tr> <td>Granulated sugar</td> <td>Sweetens the brownie batter</td> </tr> <tr> <td>Mint extract</td> <td>Adds refreshing mint flavor</td> </tr> <tr> <td>Vanilla extract</td> <td>Balances the chocolate and mint</td> </tr> <tr> <td>Eggs</td> <td>Provide structure and moisture</td> </tr> <tr> <td>All purpose flour</td> <td>Forms the brownie base</td> </tr> <tr> <td>Confectioners’ sugar</td> <td>Creates a smooth mint filling</td> </tr> <tr> <td>Heavy whipping cream</td> <td>Makes a silky ganache</td> </tr> <tr> <td>Bittersweet chocolate</td> <td>Forms the rich chocolate topping</td> </tr> </table>
Brownie Layer
The brownie base starts with 1/2 cup unsalted butter and 4 ounces of unsweetened chocolate. If you like extra mint flavor, add 1/4 cup Andes crème de menthe baking chips while melting the chocolate.
Next, stir in 1 1/4 cups granulated sugar, 1 teaspoon vanilla extract, and 1/2 teaspoon mint extract. Then mix in 2 large eggs, one at a time. Finally, fold in 1/2 cup all purpose flour and 1/4 teaspoon salt until the batter becomes smooth.
For the best texture, use room temperature eggs. They blend more easily and help create an even batter.
Creamy Mint Filling
The middle layer gives these Mint Brownies their signature flavor. Beat 1/2 cup softened unsalted butter until fluffy. Then gradually mix in 2 cups confectioners’ sugar.
Next, add 1/2 teaspoon mint extract, 1 tablespoon water, and 4 drops of green gel food coloring. Continue mixing until the filling becomes creamy and easy to spread.
You can leave out the food coloring if you prefer a natural look. The flavor will stay exactly the same.
Chocolate Ganache
The top layer is wonderfully smooth. Heat 1 cup heavy whipping cream until it just begins to simmer. Then pour it over 1 cup bittersweet chocolate chips or chopped bittersweet chocolate.
Let the mixture sit for about 2 minutes. After that, whisk until completely smooth and glossy. Allow the ganache to cool slightly before spreading it over the mint filling.
This extra cooling time helps keep the mint layer neat and distinct.
Optional Toppings & Easy Ingredient Substitutions
For extra decoration, sprinkle Andes crème de menthe baking chips over the ganache once it begins to set. They add a little crunch and even more mint flavor.
If needed, you can substitute semi sweet chocolate for bittersweet chocolate to create a sweeter topping. Likewise, dark chocolate works well if you enjoy a richer finish.
Natural green food coloring can replace gel coloring if preferred. Meanwhile, high quality peppermint extract may be used instead of mint extract for a slightly different flavor profile. Just use it sparingly because peppermint has a stronger taste than mint extract.
How to Make Mint Brownies
Making these Mint Brownies is easier than you might think. Since each layer comes together with simple ingredients, the recipe feels very manageable. Just give each layer enough time to cool before adding the next one. As a result, you’ll get clean, beautiful layers every time.
Step 1: Prepare and Bake the Brownie Base
First, preheat your oven to 325°F. Then grease an 8 or 9 inch square baking pan and line it with parchment paper. The parchment makes lifting the brownies out much easier after baking.
Next, melt the butter and unsweetened chocolate together. If you’re using Andes crème de menthe baking chips, melt them with the chocolate as well. You can do this on the stovetop or in the microwave. If you use the microwave, heat at 50% power in short intervals and stir between each round.
Once the mixture is smooth, stir in the granulated sugar, vanilla extract, and mint extract. Then let it cool for a minute or two so the eggs do not cook when added.
Add the eggs one at a time, mixing well after each addition. This step creates a smooth, glossy batter. Afterward, gently fold in the flour and salt until no dry streaks remain.
Spread the batter evenly into the prepared pan. Then bake for 25 to 30 minutes. The brownies are done when a toothpick inserted near the center comes out with a few moist crumbs.
Do not overbake them. Slightly fudgy brownies make the perfect base for these Mint Brownies.
Allow the brownies to cool completely before moving to the next layer. This patience pays off with neat layers later.
Step 2: Make the Creamy Mint Filling
While the brownies cool, prepare the mint filling.
Beat the softened butter until it becomes light and fluffy. This usually takes about 2 to 3 minutes with an electric mixer.
Next, gradually add the confectioners’ sugar. Mixing slowly at first helps prevent a cloud of powdered sugar in your kitchen.
Then stir in the mint extract, water, and green gel food coloring. Continue beating until the filling looks smooth and creamy.
Taste the filling before spreading it. If you prefer a stronger mint flavor, you can add one extra drop of mint extract. However, add it carefully because a little goes a long way.
Once the brownie layer has cooled completely, spread the mint filling evenly from edge to edge using an offset spatula or the back of a spoon.
Next, place the pan in the refrigerator while you prepare the ganache. Chilling the filling helps keep the layers separate.
Step 3: Prepare the Chocolate Ganache
The chocolate ganache adds the perfect finishing touch.
Pour the heavy whipping cream into a small saucepan. Heat it until it just begins to simmer around the edges. Do not let it boil.
Meanwhile, place the bittersweet chocolate into a heatproof bowl.
Pour the hot cream over the chocolate. Then let it sit undisturbed for about 2 minutes.
After that, whisk gently until the mixture becomes smooth, glossy, and completely combined.
Allow the ganache to cool for several minutes before pouring it onto the mint layer. If the ganache is too hot, it may soften the filling underneath.
This short cooling time helps create clean layers and a polished finish.
Step 4: Assemble, Chill, and Slice
Carefully spread the slightly cooled ganache over the chilled mint filling. Use a spatula to smooth the top into an even layer.
If you want extra decoration, sprinkle Andes crème de menthe baking chips over the ganache once it begins to set. They add extra flavor and a beautiful finish.
Then refrigerate the Mint Brownies for at least 30 minutes. However, chilling them for an hour creates even cleaner slices.
When ready to serve, lift the brownies from the pan using the parchment paper.
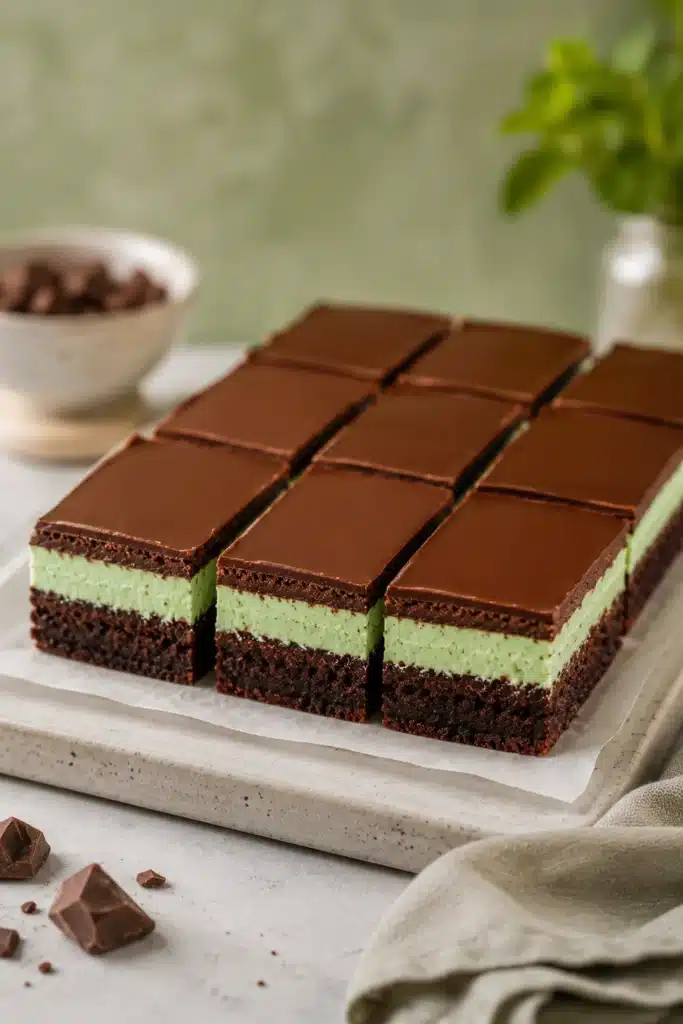
Use a large sharp knife to cut small squares. Wipe the knife clean between cuts for neat edges.
Since these Mint Brownies are wonderfully rich, smaller portions are usually perfect. They make an impressive dessert for holidays, birthdays, cookie exchanges, or anytime you want a homemade chocolate treat.
Expert Tips for Perfect Mint Brownies Every Time
Great Mint Brownies come down to a few simple techniques. Fortunately, these small details make a big difference.
First, always use room temperature eggs. They mix more evenly into the batter and help create a smoother brownie texture.
Next, avoid overheating the chocolate while melting it. Stir frequently whether you use the stovetop or microwave. Slow melting keeps the chocolate silky.
After baking, let the brownie layer cool completely before adding the mint filling. Otherwise, the butter in the filling may soften too much and become difficult to spread.
Likewise, chill the mint layer before pouring on the ganache. This extra step helps create three clean, distinct layers.
Allow the ganache to cool slightly before spreading it. Warm ganache spreads beautifully without melting the mint filling underneath.
Use parchment paper with extra overhang on two sides. Later, you can simply lift the brownies from the pan for easier slicing.
Finally, cut the Mint Brownies into small squares. They have a rich chocolate flavor and a creamy filling, so smaller portions feel just right.
If you want picture perfect slices, refrigerate the brownies well and wipe the knife clean after every cut. The extra minute of work gives professional looking results.
Easy Recipe Variations
These Mint Brownies are delicious exactly as written. However, you can easily change a few ingredients to create new flavors while keeping the same rich texture.
Peppermint Version
Replace the mint extract with peppermint extract for a brighter holiday flavor. Since peppermint is stronger, begin with a slightly smaller amount and adjust to taste.
You can also decorate the top with crushed peppermint candies during the holiday season for extra color and crunch.
White Chocolate Ganache
For a sweeter finish, replace the bittersweet chocolate with good quality white chocolate.
The creamy white topping pairs beautifully with the green mint layer. As a result, these Mint Brownies become especially festive for Christmas celebrations.
Holiday Color Ideas
Green is the classic choice for the filling, but you can easily match different occasions.
For Valentine’s Day, use pink food coloring. During winter holidays, combine red and green decorations. Meanwhile, pastel colors work beautifully for spring celebrations.
The flavor stays the same while the appearance fits the occasion.
Extra Chocolate or Nutty Additions
If you love extra texture, stir mini chocolate chips into the brownie batter before baking.
You can also sprinkle chopped walnuts, pecans, or toasted almonds over the ganache before it sets. The crunchy topping adds another layer of flavor while keeping the brownies wonderfully rich.
For even more chocolate, finish the Mint Brownies with extra Andes crème de menthe baking chips or chocolate curls before serving.
Storage and Make Ahead Tips
These Mint Brownies store beautifully, which makes them a great dessert to prepare in advance. In fact, many people think they taste even better after a day in the refrigerator because the layers become firm and the flavors blend together.
Store the brownies in an airtight container in the refrigerator for up to 5 days. If you stack them, place a sheet of parchment paper between the layers to keep the ganache looking smooth.
You can also freeze these Mint Brownies for up to 3 months. First, wrap each brownie individually in plastic wrap. Then place them inside a freezer safe container or zip top bag.
When you’re ready to enjoy them, thaw the brownies overnight in the refrigerator. They will keep their creamy filling and rich texture.
If you’re making them for a party or holiday gathering, prepare the brownies a day ahead. Then keep them chilled until serving time. This simple plan saves time and gives you perfectly sliced brownies with very little effort.
Serving Suggestions
These Mint Brownies are delicious straight from the refrigerator because the layers stay firm and creamy.
Serve them with a scoop of vanilla ice cream for a classic dessert combination. Meanwhile, fresh whipped cream adds a light finish that balances the rich chocolate.
For special occasions, garnish each brownie with chocolate curls, extra Andes crème de menthe baking chips, or a few fresh mint leaves.
They also pair wonderfully with hot coffee, espresso, hot chocolate, or a glass of cold milk.
Since these Mint Brownies are very rich, smaller squares make the perfect serving size. They fit beautifully on dessert platters, holiday cookie trays, and party buffets.
Craving More Delicious Recipes?
If you enjoyed these Mint Brownies, here are a few more desserts to try next.
- Fudgy Chocolate Raspberry Brownies: https://ketoatmeal.com/chocolate-raspberry-brownies/
- Creamy Easy Ice Cream Cake with brownie layers: https://ketoatmeal.com/easy-ice-cream-cake/
- Rich Ice Cream Cake for chocolate lovers: https://ketoatmeal.com/ice-cream-cake-recipe/
- Decadent Choco Cheesecake Cookie Bites: https://ketoatmeal.com/choco-cheesecake-cookie-bites/
- Bright and refreshing Best Key Lime Pie: https://ketoatmeal.com/best-key-lime-pie/
- Creamy Luscious Lemon Raspberry Swirl Cheesecake: https://ketoatmeal.com/luscious-lemon-raspberry-swirl-cheesecake/
You can also find more dessert inspiration, baking ideas, and recipe updates on our Pinterest page: https://www.pinterest.com/ketoatmeal/
Final Thoughts
These Mint Brownies combine everything people love about a homemade dessert. You get a rich fudgy brownie, a smooth mint filling, and a silky chocolate ganache in every bite. Even better, the recipe uses simple ingredients and easy steps, so anyone can make it with confidence.
Whether you’re baking for a holiday, birthday, family dinner, or weekend treat, these Mint Brownies always make a memorable dessert. Since they store well and can be prepared ahead of time, they are also a practical choice for busy schedules.
Once you try this recipe, you’ll probably find yourself making it again for every special occasion. One bite is all it takes to understand why these Mint Brownies remain a favorite among chocolate and mint lovers.