
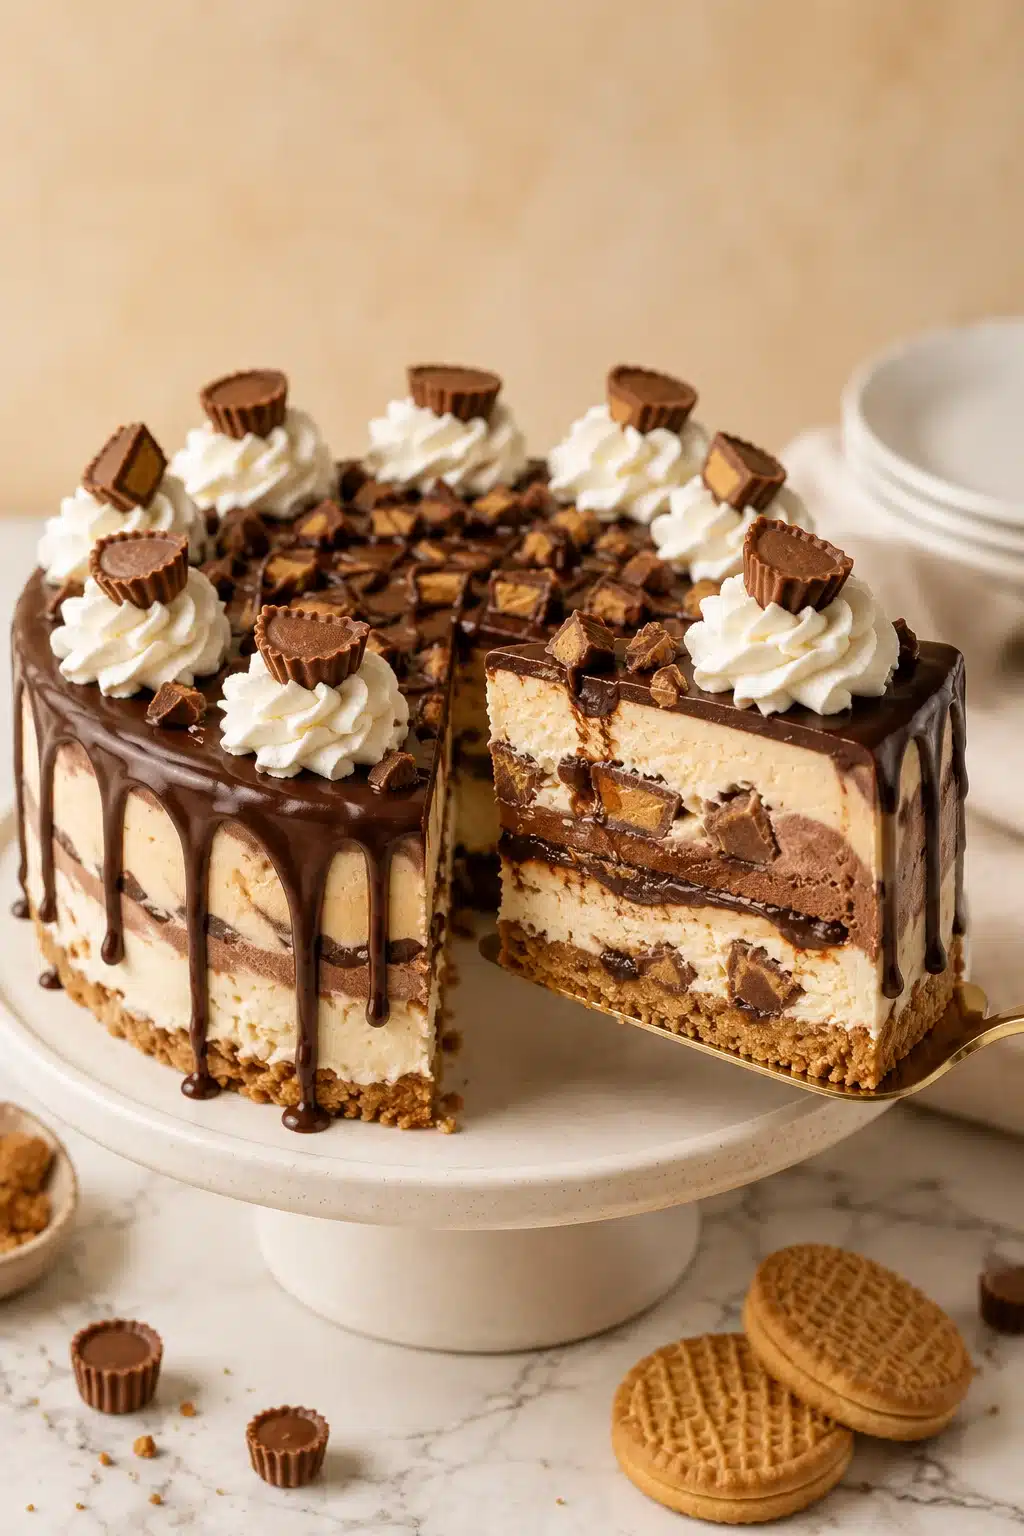
This Chocolate Peanut Butter Ice Cream Cake is rich, creamy, and packed with chocolate and peanut butter flavor. It is a fun dessert for birthdays, holidays, or summer parties. If you love frozen treats, this recipe will quickly become a family favorite.
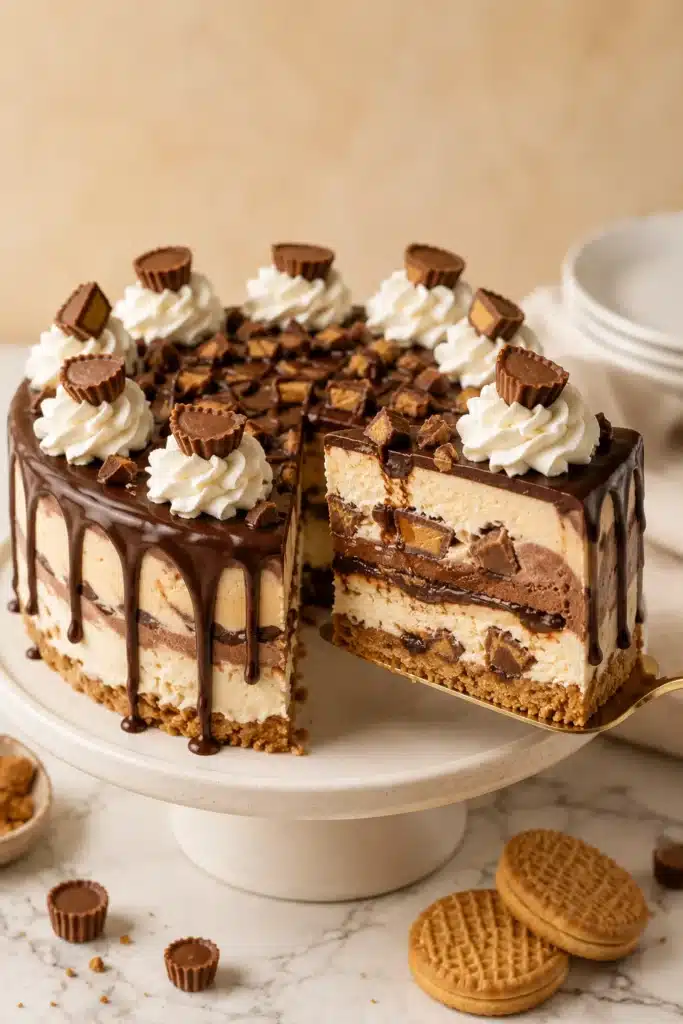
Table of Contents
Why You’ll Love This Chocolate Peanut Butter Ice Cream Cake
If you love chocolate and peanut butter together, this Chocolate Peanut Butter Ice Cream Cake is the perfect dessert. Every bite brings creamy ice cream, crunchy peanut butter cookies, smooth hot fudge, and delicious peanut butter cups. As a result, each slice tastes like your favorite candy bar in cake form.
Another reason to love this recipe is how simple it is to make. You do not need an oven after preparing the cookie crust. Instead, the freezer does most of the work. That means you can make this dessert ahead of time and enjoy a stress free celebration later.
The layered texture makes every slice exciting. First, you get the crunchy cookie crust. Then, the warm flavor of hot fudge blends with the peanut butter cups. Next, the creamy vanilla ice cream creates a smooth middle layer. Finally, the Moose Tracks ice cream adds even more chocolate, fudge, and peanut butter goodness.
This Chocolate Peanut Butter Ice Cream Cake also works well for many occasions. It fits birthday parties, family dinners, cookouts, and holiday celebrations. Meanwhile, kids and adults both enjoy the rich flavors, so you rarely have leftovers.
You can also customize the recipe with your favorite ice cream flavors or candy toppings. Therefore, every cake can feel a little different while keeping the same delicious base.
Perhaps my favorite part is serving this cake on a hot summer day. Watching everyone smile after the first bite always makes the little bit of freezer time worth it.
Ingredients You’ll Need
This Chocolate Peanut Butter Ice Cream Cake uses simple ingredients that you can find in most grocery stores. Each one adds flavor, texture, or structure to the finished dessert. Therefore, using good quality ingredients makes a noticeable difference.
Before you begin, let the ice cream soften for several minutes. It should spread easily without becoming completely melted. Meanwhile, prepare enough freezer space for the springform pan.
For the Peanut Butter Cookie Crust
You will need 24 Nutter Butter cookies or another peanut butter sandwich cookie with a similar texture. Crush the cookies into fine crumbs and mix them with 1/3 cup melted unsalted butter. The butter holds the crumbs together and creates a firm crust that stays crisp even after freezing.
Ice Cream and Filling Layers
For the filling, use one 10 ounce jar of hot fudge topping, plus an extra 2 ounces for decorating later. You will also need 12 full size Reese’s Peanut Butter Cups, chopped or left whole depending on your preference.
The ice cream layers include 1½ quarts of vanilla ice cream and 1½ quarts of Moose Tracks ice cream. The vanilla layer balances the rich chocolate flavors, while the Moose Tracks layer adds chocolate pieces, fudge ribbons, and extra peanut butter flavor. Together, they create the signature taste of this Chocolate Peanut Butter Ice Cream Cake.
Whipped Cream Topping and Garnishes
Fresh whipped cream gives this dessert a light finish. Combine 1 cup heavy whipping cream with 1/4 cup powdered sugar and 1/4 teaspoon vanilla extract. Whip until stiff peaks form for easy piping.
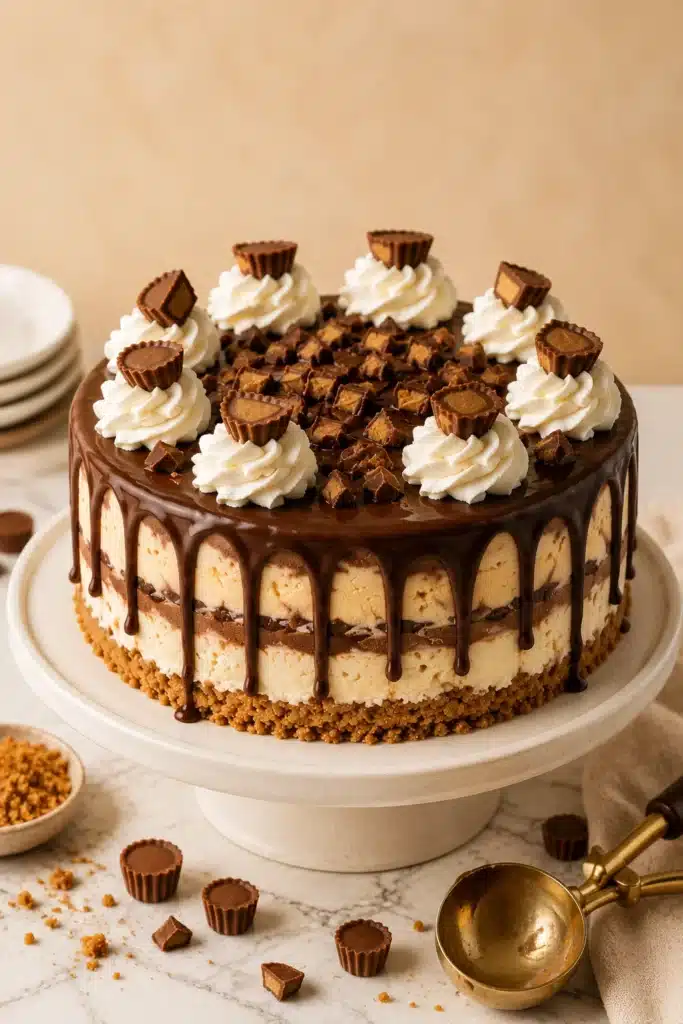
Finally, decorate the cake with hot fudge and 8 Reese’s Minis. These simple toppings make every slice look festive while adding even more chocolate peanut butter flavor.
Best Ingredients and Easy Substitutions
One of the best things about this Chocolate Peanut Butter Ice Cream Cake is how flexible it is. While the original recipe tastes amazing, you can easily adjust it to match your family’s favorites or whatever you already have at home.
Good quality ice cream creates the creamiest texture. Likewise, a rich hot fudge topping gives every layer more chocolate flavor. Fresh whipped cream also adds a lighter finish than many frozen toppings.
If you plan to serve this cake at a birthday party, you can even match the ice cream flavors to the guest of honor’s favorites. As a result, the recipe feels personal without adding extra work.
Choosing the Best Ice Cream Flavors
Vanilla and Moose Tracks create the classic combination for this Chocolate Peanut Butter Ice Cream Cake. However, chocolate, peanut butter cup, cookies and cream, or chocolate fudge brownie ice cream also taste fantastic.
Coffee ice cream offers a richer flavor for adults, while chocolate chip cookie dough gives kids another fun option. Whatever flavors you choose, let them soften slightly before spreading for smooth, even layers.
Simple Ingredient Swaps
If you cannot find Nutter Butter cookies, use any peanut butter sandwich cookies with a similar texture. Chocolate sandwich cookies also create a delicious chocolate crust.
Frozen whipped topping works well if you prefer a quicker option instead of homemade whipped cream. Likewise, homemade hot fudge or your favorite store bought brand both work beautifully.
You can also replace Reese’s Peanut Butter Cups with peanut butter filled chocolate candies or chopped chocolate bars. Meanwhile, if Moose Tracks ice cream is unavailable, simply use another chocolate ice cream with fudge swirls and chocolate chunks.
These easy substitutions help you create a Chocolate Peanut Butter Ice Cream Cake that fits your taste while keeping the same creamy, rich, and satisfying dessert everyone loves.
How to Make Chocolate Peanut Butter Ice Cream Cake
Making this Chocolate Peanut Butter Ice Cream Cake is easier than it looks. The freezer does most of the work, so you only need to build each layer carefully. As a result, you will end up with a beautiful dessert that slices cleanly and tastes incredible.
Take your time during each freezing step. Although it may seem slow, those extra hours help every layer stay firm and neat. Meanwhile, gather all your ingredients before you begin so the process feels simple and organized.
Prepare the Cookie Crust
Start by crushing the Nutter Butter cookies into very fine crumbs. You can use a food processor for the quickest results. However, a rolling pin and a sealed plastic bag work just as well.
Next, stir the cookie crumbs with the melted unsalted butter until every crumb looks evenly coated. The mixture should resemble wet sand.
Press the mixture firmly into the bottom of a 9 inch springform pan. Then press some of the crumbs about 1 inch up the sides of the pan. This creates a sturdy crust that holds the filling beautifully.
Place the pan in the freezer for at least 30 minutes. Meanwhile, prepare the remaining ingredients so you can move quickly to the next layer.
Add the Hot Fudge and Peanut Butter Cup Layer
Once the crust feels firm, spread the 10 ounces of hot fudge evenly over the bottom. If the fudge is too thick, warm it slightly so it spreads smoothly.
Next, scatter the chopped Reese’s Peanut Butter Cups over the hot fudge. Try to spread them evenly so every slice gets plenty of chocolate and peanut butter.
Return the pan to the freezer for about 1 hour. This step helps the fudge set before you add the ice cream. As a result, the layers stay separate and look much cleaner when sliced.
Freeze the Vanilla Ice Cream Layer
Allow the vanilla ice cream to soften for several minutes. It should spread easily without becoming runny.
Spoon the softened vanilla ice cream over the frozen candy layer. Then gently smooth the surface with an offset spatula or the back of a large spoon.
Work carefully so you do not disturb the fudge underneath. Likewise, try to create an even layer from edge to edge.
Cover the pan with plastic wrap or foil. Then freeze the cake for at least 3 hours until the vanilla layer feels completely firm.
Although waiting takes patience, this step makes a huge difference in the finished Chocolate Peanut Butter Ice Cream Cake.
Add the Moose Tracks Ice Cream Layer
While the vanilla layer freezes, let the Moose Tracks ice cream soften slightly.
Once the vanilla layer is firm, spread the Moose Tracks ice cream evenly across the top. Use gentle strokes to keep the lower layers intact.
Smooth the surface carefully until it looks flat and even. This creates a professional looking finish once you decorate the cake.
Cover the pan again and place it back into the freezer for at least 6 hours. However, overnight freezing gives the best texture and makes slicing much easier.
The longer freeze also helps every flavor blend together without becoming messy during serving.
Make the Homemade Whipped Cream
Just before serving, prepare the whipped cream.
Pour the heavy whipping cream into a chilled mixing bowl. Beat until soft peaks begin to form.
Next, add the powdered sugar and vanilla extract. Continue beating until stiff peaks develop.
The whipped cream should hold its shape without becoming grainy. Fresh whipped cream adds a light finish that balances the rich chocolate and peanut butter flavors perfectly.
If you prefer, frozen whipped topping also works well as a quick substitute.
Decorate and Serve the Cake
Remove the Chocolate Peanut Butter Ice Cream Cake from the freezer and let it sit for several minutes. This short resting time makes it easier to remove the springform ring without damaging the edges.
Once released from the pan, drizzle the extra hot fudge across the top. Then pipe or spread the whipped cream around the edges or across the surface.
Finish by placing the Reese’s Minis on top for a fun and colorful decoration. You can also sprinkle chopped peanut butter cups or chocolate pieces over the whipped cream if you want even more texture.
Use a sharp knife dipped in warm water before each cut. Wipe the blade clean between slices for neat, bakery style servings.
Serve the cake immediately after decorating. The ice cream stays firm, the whipped cream looks fresh, and every slice keeps its beautiful layers.
Expert Tips for the Perfect Ice Cream Cake
A few simple tricks can make your Chocolate Peanut Butter Ice Cream Cake look and taste even better. Fortunately, none of them require extra ingredients. Instead, they simply help you build cleaner layers and serve perfect slices.
Always plan enough freezing time before serving. Likewise, prepare your decorations in advance so everything comes together quickly at the end.
Using a springform pan also makes removing the cake much easier. As a result, the finished dessert looks neat enough for birthdays, holidays, and special occasions.
Freezing Tips for Clean Layers
Freeze every layer until it feels completely firm before adding the next one.
Meanwhile, keep the ice cream only slightly softened. If it melts too much, the layers may mix together instead of staying distinct.
Cover the cake tightly between freezing periods. This prevents ice crystals from forming and keeps the flavors fresh.
If possible, freeze the completed cake overnight. The longer resting time helps the cake slice beautifully.
Decorating Without Melting
Prepare the whipped cream only when the cake is fully frozen and ready to serve.
Next, remove the cake from the freezer only long enough to decorate it. Work quickly while adding the hot fudge and Reese’s Minis.
Keep the whipped cream chilled until the last minute. Then decorate immediately before serving.
Finally, return any leftovers to the freezer as soon as possible to keep the Chocolate Peanut Butter Ice Cream Cake firm and delicious.
Fun Flavor Variations
One reason this Chocolate Peanut Butter Ice Cream Cake stays so popular is its flexibility. You can change the flavors while keeping the same simple method. Therefore, you can make a different version for every celebration.
Small changes create exciting new desserts without adding much extra work. Meanwhile, the cookie crust and layered technique remain exactly the same.
Chocolate Lover’s Version
Replace the vanilla ice cream with chocolate ice cream for an even richer dessert. Then add extra chocolate chips, chocolate cookie pieces, or chopped fudge brownies between the layers.
Finish with plenty of hot fudge and chocolate curls for the ultimate chocolate treat.
Peanut Butter Overload Version
Choose peanut butter cup ice cream instead of vanilla. Then mix chopped peanut butter cookies into the Moose Tracks layer.
Finally, drizzle warm peanut butter over the whipped cream before adding the Reese’s Minis. Every bite becomes even creamier and richer.
Family Friendly Flavor Ideas
Kids love colorful versions of this Chocolate Peanut Butter Ice Cream Cake. Try cookies and cream, birthday cake, or chocolate chip cookie dough ice cream instead.
You can also decorate with mini chocolate candies, colorful sprinkles, or crushed cookies. As a result, every cake feels festive and perfect for birthdays or family celebrations.
How to Store and Make Ahead
This Chocolate Peanut Butter Ice Cream Cake is an excellent make ahead dessert. In fact, making it a day before serving gives the layers plenty of time to firm up. As a result, every slice looks cleaner and tastes even better.
Once decorated, serve the cake as soon as possible for the freshest appearance. However, any leftovers can return to the freezer for another day.
Freezer Storage Tips
Store the Chocolate Peanut Butter Ice Cream Cake tightly covered with plastic wrap and a layer of aluminum foil. This helps keep freezer odors away while preventing ice crystals from forming.
If you have leftover slices, place them in airtight containers or wrap them individually. Then freeze them for up to two weeks for the best flavor and texture.
Avoid leaving the cake at room temperature for more than a few minutes. Otherwise, the layers will soften too much and become difficult to slice neatly.
Make Ahead and Serving Advice
You can prepare the entire Chocolate Peanut Butter Ice Cream Cake one or even two days before serving. In fact, overnight freezing creates the firmest texture.
Wait to add the whipped cream, hot fudge drizzle, and Reese’s Minis until just before serving. This keeps the decorations looking fresh and prevents melting.
Before removing the springform ring, let the cake sit at room temperature for about 5 minutes. Then use a warm knife for smooth, clean slices every time.
Common Mistakes to Avoid
Even though this Chocolate Peanut Butter Ice Cream Cake is simple to make, a few common mistakes can affect the final result. Fortunately, they are easy to avoid.
Do not spread completely melted ice cream into the pan. Instead, let it soften only until it spreads easily. This helps every layer stay neat.
Also, never skip the freezing times between layers. Otherwise, the hot fudge and ice cream can mix together instead of creating distinct layers.
Press the cookie crust firmly into the pan. If the crust stays loose, it may crumble while serving.
Another mistake is decorating the cake too early. Instead, add the whipped cream, hot fudge, and Reese’s Minis just before serving for the best appearance.
Finally, always use a springform pan if possible. It makes removing the Chocolate Peanut Butter Ice Cream Cake much easier and helps preserve the beautiful shape.
Craving More Delicious Recipes?
If you enjoyed this Chocolate Peanut Butter Ice Cream Cake, try these reader favorites next:
- Keto Chocolate Ice Cream
https://ketoatmeal.com/keto-chocolate-ice-cream/ - No Churn Keto Vanilla Ice Cream
https://ketoatmeal.com/no-churn-keto-vanilla-ice-cream/ - Keto Peanut Butter Cheesecake
https://ketoatmeal.com/keto-peanut-butter-cheesecake/ - Easy Keto Chocolate Cheesecake
https://ketoatmeal.com/keto-chocolate-cheesecake/ - Keto Peanut Butter Brownies
https://ketoatmeal.com/keto-peanut-butter-brownies/ - Sugar Free Chocolate Dessert Recipes
https://ketoatmeal.com/category/chocolate-desserts/
For even more dessert inspiration, follow us on Pinterest:
https://www.pinterest.com/ketoatmeal/
Final Thoughts
This Chocolate Peanut Butter Ice Cream Cake combines everything people love about frozen desserts into one unforgettable treat. The crunchy peanut butter cookie crust, creamy ice cream layers, rich hot fudge, and peanut butter cups create an amazing combination in every bite.
Better yet, this recipe is simple enough for beginners while still looking impressive for birthdays, holidays, and family celebrations. You can also customize the flavors with your favorite ice cream or candy, making every cake a little different.
Whether you serve it during summer or for a special occasion, this Chocolate Peanut Butter Ice Cream Cake is guaranteed to disappear quickly. Once you make it, there is a good chance your family will request it again and again.